
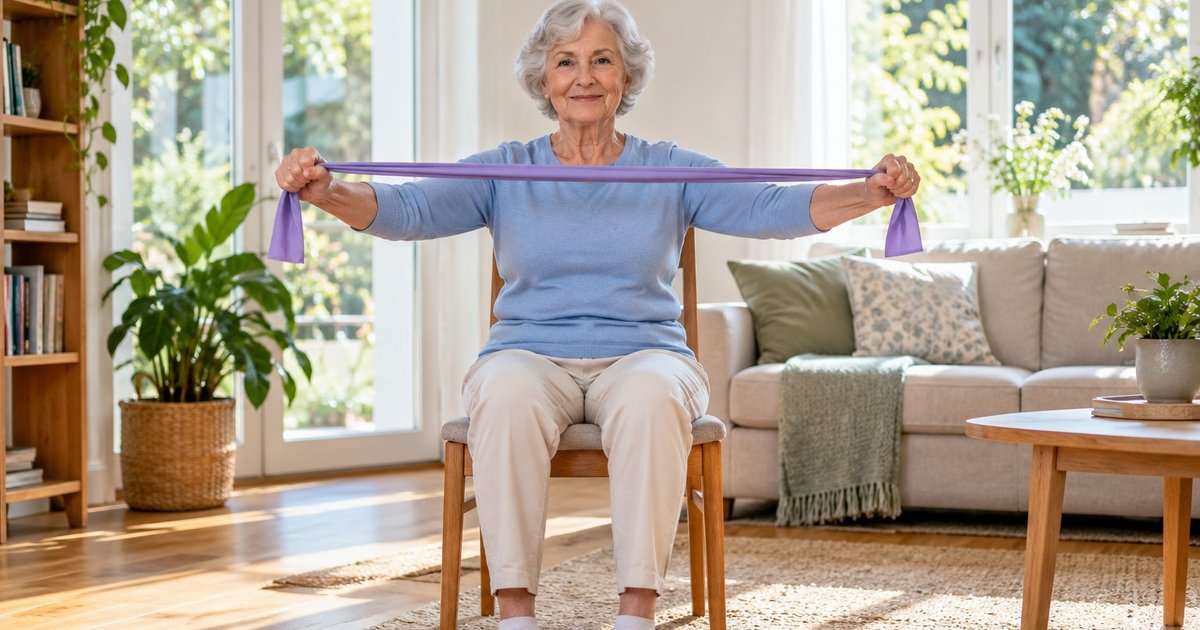
For most beginners, including older adults, a small set of light-to-medium resistance bands is a simple, low-cost way to start strength exercise at home. Choose the band type that suits the moves you want to do, start with a resistance you can control smoothly, check whether the band is latex before you buy, and anchor it securely every time. If you have a health condition, check with your doctor or physiotherapist before you begin.
This article contains affiliate links. As an Amazon Associate I earn from qualifying purchases, at no extra cost to you. Affiliate disclosure.
This guide compares the main band types, explains why colour coding is not a universal standard, covers latex and anchoring safety, and finishes with a gentle starter routine framed as general activity guidance, plus a checklist for knowing when to move up a level.
At a glance
- Four main types: flat therapy bands, tube bands with handles, large loop bands and mini loop bands. Each suits different exercises.
- Colours are brand-specific. One brand’s “green” may be another brand’s “red”, so read the stated level, not just the colour.
- Latex allergy is a real consideration. Many bands are made from natural rubber latex; latex-free and fabric options exist.
- Safety is mostly about set-up: inspect the band, anchor it securely, keep it away from your face and never let go under tension.
- Guidelines support strength work: the WHO recommends muscle-strengthening activity on two or more days a week for adults, including older adults.
Why bands are a good fit for beginners
Australia’s physical activity guidelines for older Australians (65 years and over) describe four kinds of activity worth including: fitness, strength, flexibility and balance, and note that strength exercises help maintain muscle and bone strength. The World Health Organization’s 2020 guidelines recommend that adults do muscle-strengthening activities on two or more days a week, and that older adults also do varied, multicomponent activity combining balance and strength on three or more days a week.
Bands make that easier to start because they are light, cheap compared with most gym equipment, easy to store and travel with, and adjustable: you can make an exercise easier or harder simply by changing your grip or stance. Resistance also builds gradually as the band stretches, which many beginners find gentler than lifting a fixed weight from the floor. If you want the background on why strength work matters as you age, see strength training and bone density.
The main types of resistance band compared
| Band type | What it looks like | Good for | Things to know |
|---|---|---|---|
| Flat therapy band | A long, flat, open-ended strip, often sold on a roll or in pre-cut lengths | Gentle upper-body and leg exercises, seated work, exercises often used in physiotherapy programmes | Can be tied or wrapped to adjust length; can roll or pinch skin; many are latex |
| Tube band with handles | A rubber tube with a handle at each end, often with a door anchor | Rows, presses, curls and other “gym-style” moves; easy to grip | Handles suit people with reduced grip strength or arthritic hands; check clips and attachments for wear |
| Large loop band (power band) | A long, continuous loop, usually thicker and stronger | Standing exercises, assisted stretches, anchoring around a sturdy post | Often too strong for beginners; heavier levels store a lot of energy if they slip |
| Mini loop band | A short, small loop worn around the thighs or ankles | Hip and leg exercises such as side steps and bridges | Can roll up on bare skin; fabric versions are less likely to roll and are often latex-free |
If you are unsure where to start, a tube band with handles or a set of flat therapy bands covers most beginner upper and lower body exercises. A mini loop band is a useful addition once you are comfortable. If you are also building a home Pilates corner, the guide to Pilates mats, props and reformers explains how bands fit alongside other small equipment.
Resistance levels and colour coding
Bands are usually sold in a range of strengths, from extra light to extra heavy, and most brands use colours to show the level. There is no universal colour standard across brands, so the same colour can mean very different tension from one manufacturer to the next. Some brands print an approximate resistance figure, but these are measured in different ways and are not directly comparable between brands.
Two practical points matter more than the colour:
- Tension depends on stretch. The further you stretch a band, the harder it gets. Standing further from the anchor, or holding the band shorter, makes any band feel stronger.
- Start lighter than you think. The right starting band lets you move slowly and smoothly through the whole range, with good posture, and finish a set feeling you could have done a few more.
A set of three or more graded bands from the same brand gives you room to progress without guessing how a new brand compares.
Latex allergy and band materials
Many traditional bands are made from natural rubber latex. The Australasian Society of Clinical Immunology and Allergy (ASCIA) explains that latex can cause several kinds of reaction, from skin irritation and delayed contact dermatitis to immediate allergic reactions such as hives, and in severe cases anaphylaxis. ASCIA lists everyday rubber items, including rubber bands, elastic and rubber grips, among products that can contain latex, and advises people with latex allergy to avoid latex in all its forms.
- If you have a known latex allergy, or react to rubber gloves or balloons, choose a band clearly labelled latex-free, such as those made from TPE (thermoplastic elastomer) or fabric.
- Check the handles and grips too, not just the band itself.
- If you are unsure whether you have a latex allergy, talk to your doctor before buying.
- Think about others in your household or class who might handle the band.
Anchoring and set-up safety
The main safety risks with bands are a band slipping, snapping or being released under tension. A minute of careful set-up before each session makes a real difference.
- Inspect before every session. Stretch the band gently and look for nicks, thin spots, tears, stickiness or cracking. Replace any band that shows damage.
- Use a proper door anchor if you anchor to a door. Place it in the door frame on the side where the door closes away from you, so pulling on the band pulls the door more firmly shut. Close and, if possible, lock the door so no one opens it mid-exercise.
- Anchor only to something solid and fixed. Avoid furniture that can tip or slide, and anything with sharp edges that could cut the band.
- Keep the band away from your face. Set up exercises so that if the band slips, it moves away from your eyes and head.
- Secure foot positions. When standing on a band, place it under the middle of your foot in flat, enclosed shoes, so it cannot slide out.
- Never let go under tension. Return slowly to the start position before releasing.
- Use support for balance. Do standing exercises next to a sturdy bench, kitchen counter or wall, and sit on a stable chair without wheels for seated moves.
- Store bands out of direct sun and heat, away from sharp objects and pets, and follow the maker’s care instructions.
A gentle beginner routine
This is general activity guidance, not a personal exercise prescription. Check with your doctor or physiotherapist first if you have a health condition, recent surgery or injury, a joint replacement, or any concern about your heart, blood pressure, balance or bones. Australia’s guidelines specifically suggest talking to your doctor about what activity suits you if you have conditions such as heart problems, diabetes, asthma, arthritis or osteoporosis.
Warm up first with a few minutes of easy movement such as marching on the spot or a short walk. For each exercise, move slowly, breathe steadily (do not hold your breath) and stop a few repetitions before your form starts to slip.
- Seated row. Sit tall on a sturdy chair with legs out in front, the middle of the band looped around the soles of your feet, an end in each hand. Draw your elbows back, squeezing your shoulder blades together, then return slowly.
- Seated chest press. Sit tall and pass the band behind your upper back, holding an end in each hand at chest level. Press your hands forward until your arms are nearly straight, then return slowly.
- Biceps curl. Sit or stand with the band under the middle of your feet. Holding the ends with palms facing forward, bend your elbows to bring your hands towards your shoulders, then lower slowly.
- Sit-to-stand. Without a band at first, sit on a firm chair and stand up using your legs, then sit down slowly with control. Once this feels easy, a mini loop band just above the knees can be added, if your physiotherapist agrees.
- Side step with support. Standing beside a bench or counter with one hand on it, and a mini band around your thighs if comfortable, take a small, slow step to the side and bring the other foot to follow. Repeat in the other direction.
- Seated leg press. Sit tall with one foot in the middle of the band and the ends held near your chest. Bring that knee towards you, then press the foot forward slowly until the leg is nearly straight. Swap sides.
Finish with a few minutes of easy walking and gentle stretching. Aim for two or three sessions a week on non-consecutive days at first, in line with the WHO guidance of two or more days of muscle-strengthening activity a week. On other days, everyday movement and walking count too; see why everyday movement matters and, if you walk indoors, walking pad vs treadmill.
Stop and seek advice if you notice
- Chest pain, pressure or tightness
- Dizziness, light-headedness or unusual breathlessness
- Sharp or worsening joint pain (mild muscle tiredness is normal; pain is not)
- A sudden change in heartbeat
If symptoms are severe or do not settle with rest, seek urgent medical help.
How to know when to move up a level
Progress gradually. Before you change anything, check that you can tick every item on this list for a given exercise.
- You can complete your usual repetitions with smooth, controlled movement in both directions.
- Your posture stays steady and you are not swinging or using momentum.
- You can breathe normally throughout.
- You have no pain during or after, other than ordinary muscle tiredness that settles within a day or two.
- The last few repetitions feel easy for at least two sessions in a row.
Then make one change at a time: a few more repetitions, a second set, a shorter grip, or the next band up in the same brand’s range. Strength work pairs well with balance practice; the guide to balance habits for healthy ageing explains what the guidelines say. Food matters too, and the article on protein after forty covers how much protein adults generally need.
How to choose: a buying checklist
- Match the type to your exercises: handles for gym-style moves and easier grip, flat bands for gentle and seated work, mini loops for hips and legs.
- Buy a graded set from one brand so the levels progress predictably.
- Check the material: latex or latex-free, and the handle and grip materials.
- Look for a door anchor if you plan to do standing pulls and presses.
- Read the care and safety instructions and the maker’s guidance on replacing bands.
- Check the return policy in case the levels do not suit you. Prices and availability vary by country and retailer.
Our picks on Amazon: resistance bands for beginners
These sets match the band types compared above. Start with the lightest level and work up.
- Fit Simplify Resistance Loop Bands (set of 5): mini loop bands in five colour-coded levels, good for legs and hips.
- Black Mountain Products Resistance Band Set: tube bands with handles, a door anchor and ankle strap for a full-body routine.
- THERABAND Resistance Bands Set: long flat bands in graded resistances, widely used in exercise classes.
- Fabric Resistance Bands (set of 3): wide fabric loops that are less likely to roll or pinch.
Check the label for latex if you have a latex allergy (see the materials section above). Prices and availability change. Check the size, materials and returns policy before you buy, and ask your doctor or physiotherapist first if you have a health condition or injury.
Common mistakes to avoid
- Starting too heavy. A band that is too strong pulls you out of position and makes the exercise less safe.
- Judging by colour alone. Colours are not standard across brands.
- Using a worn band. Small nicks can become a snap. Inspect every time.
- Weak anchoring. Tying a band around a chair leg or door handle can let it slip.
- Letting the band snap back. Control the return phase as carefully as the effort phase.
- Holding your breath. Breathe steadily throughout each movement.
- Skipping balance support. Keep a counter, bench or wall within reach for standing moves.
- Ignoring your health history. Check with your doctor or physiotherapist if you have a health condition.
Related guide: 10 Easy Exercises for Seniors: A Simple, Safe Home Routine.
Sources this guide draws on: the Australian Government Department of Health guidelines for older Australians (65 years and over); the World Health Organization 2020 guidelines on physical activity and sedentary behaviour; and the Australasian Society of Clinical Immunology and Allergy (ASCIA) information on latex allergy.
Frequently asked questions
What resistance band should a senior start with?
Most beginners do well starting with a light band in the type that suits their exercises, often a tube band with handles or a flat therapy band. The right level lets you move slowly and smoothly with good posture. Because colours vary by brand, buy a graded set from one brand and start at the lighter end.
Are resistance bands safe for older adults?
Bands are widely used in home exercise, and most risks come from set-up: worn bands, poor anchoring or releasing under tension. Inspect bands, anchor securely, use support for balance and keep bands away from your face. If you have a health condition, check with your doctor or physiotherapist before starting.
How often should I use resistance bands?
The WHO recommends muscle-strengthening activities on two or more days a week for adults, including older adults. Many beginners start with two or three short sessions a week on non-consecutive days and build gradually.
What do the colours on resistance bands mean?
Colours show the resistance level within a brand’s own range, usually from lighter to heavier. There is no universal standard, so the same colour can mean different tension from different makers. Check the stated level on the packaging.
Are there latex-free resistance bands?
Yes. Many bands are natural rubber latex, but latex-free bands made from TPE or fabric are widely available. If you have a latex allergy, ASCIA advises avoiding latex in all its forms, so choose bands, handles and grips clearly labelled latex-free.
Can I use resistance bands sitting down?
Yes. Many band exercises, including rows, chest presses, curls and leg presses, can be done seated on a sturdy chair without wheels, which is a comfortable way to start if balance is a concern.
Resistance bands make strength exercise accessible at home with very little space or cost. Start light, set up carefully, move slowly, and build from there, one small change at a time. If you have a health condition or any doubts, a session with a physiotherapist can tailor the routine to you and give you confidence that you are using your bands the right way.